How to Create System Restore Point in Windows 10?
Windows 10 is a totally news operating system and it has undergone many changes as compared to Windows 7 or Windows 8/8.1.
There are different processes to do many things and this why we are updating Windows 10 tutorials that you can try on your Windows 10 PC or Laptop or even tablets if you wish to. In this post, we are going to tell you the process to create system restore point on Windows 10.
Windows System Restore is a very useful feature of Windows OS that lets you roll back each and every change made to Windows and roll back to a previous date to which the system restore point was set.
This is a really handy feature that can be used if you mistakenly install some kind of conflicting software or driver that makes your Windows installation unusable.
Let us move on to the real procedure and see how to create system restore point on Windows 10.
How to Create System Restore Point in Windows 10?
Even though Windows 10 automatically creates system restore points whenever you install or uninstall a program or a driver, you can set manual restore points for safety purposes. This process is the most simple process that you can use to create a restore point on Windows 10. Just follow the steps one by one.
- Click the Search or Cortana icon on the taskbar or just open the Start menu and type System Restore.
- You will see that an option to create system restore point will come up.


- Click this option and you will see a new window which looks like the image below.

- You might notice that the buttons to create a system restore point and the System Restore buttons are disabled.
- You can enable them by clicking on Configure.
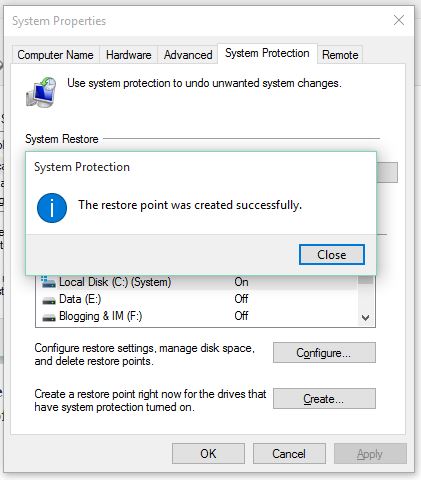
- Now in the new window that pops up, you will see an option to Turn on system protection.
- Click that option and click OK.

- After clicking OK, you will notice that both the System Restore and Create buttons are enabled.

- Now you have to click the Create button and this will open a new window dialogue.
- You will need to enter the name of the restore point. Name it anything you want.

- Hit the Create button and this will start creating the restore point. This might take a minute or two depending on the speed of your PC.

- After the restore point is set, you will see a success dialogue.

This is how to create system restore point on Windows 10.
How to perform system restore?
- In case you want to perform a system restore to this point, just click the System Restore button in the same Window and you will see that a wizard will pop up.
- Follow the wizard and you will see the list of restore points on your PC.
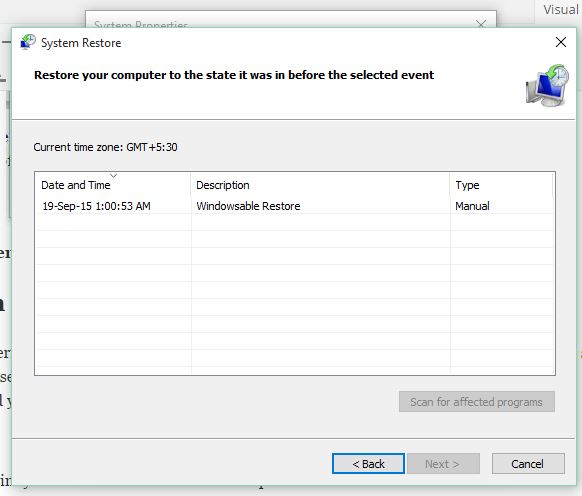

- Choose the restore point you want to restore from and the process will be done in no time.

Comment(s)
Recent Posts